Creating an expenses spreadsheet can be a lot of fun and a great learning experience for both individuals and businesses. In this article, I am going to share with you how to create an expenses spreadsheet using Microsoft Excel.
The first thing you will need to do is to open the spreadsheet. It can be found on your main view or on the “Tools” menu. The program should appear on the menu when you click on “Excel”.
Now you will have to click on the option called “Import” on the left menu, to upload the CSV file you created earlier. This is the easiest way to import a CSV file into the program.
How to Create an Expenses Spreadsheet Using Microsoft Excel
Once the CSV file has been imported, the next step is to create a new column in the document for expenses. Under the menu, click on “Edit Columns”. This will allow you to create a new column for expense.
Choose a new name for the column. You can also give the column a category. Choose “Business” for the category and choose “Personal” for the name.
Choose the “Rows” option under the menu and the row you created should appear in the document. For each expense category, click on the section name. The whole section will now appear on the screen. Look for the section name and type its corresponding code.
Now you have to click on the section header to create a new column. If you want to separate expense columns, just use a tab instead of the colon. Type the category and division number (each item/line) as your delimiter.
Next, fill in each expense row with the total amount of that expense. Type the name of the column as well as the code for the right hand side of the row. When it is done, click on the Save button at the bottom of the screen.
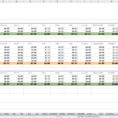
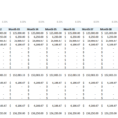
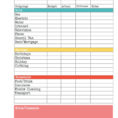
Repeat the process for each column in the document and then save the document. This is how to create an expenses spreadsheet using Microsoft Excel. When you are done, your expenses should appear like this:
However, if you encounter any errors, you can also use the following steps to format the file and get rid of the errors:
These are all the things you need to know to use Excel to open a CSV file and make sure your document looks nice. You can get started using Microsoft Excel by registering for a free trial version.
Learn the software and then start using it. You won’t regret it. YOU MUST LOOK : how to create an expense spreadsheet in excel
Sample for How To Create An Expenses Spreadsheet